
This post contains Affiliate Links
I always knew that our home would look amazing with Christmas wreaths in the windows. But, last year being my first year to hang them, I was left scratching my head wondering exactly how I was going to securely hang them.

After asking around, and googling “How to Hang Wreaths on Outdoor Windows.” I found some ideas, but none of them seemed like simple ideas that actually worked. When I was wondering around the Home Depot, I found these Command Brand Strips that are made especially for the outdoors, and especially for windows. Finally, an easy solution that isn’t permanent and really worked! If you follow my step by step, the hooks will stay on no problem!

This is what you will need to hang Christmas wreaths on your windows: (affiliate links used)
- Faux Pine 18 inch Holiday Wreaths from Michaels Craft you can also find them online here.
- Red Holiday Bows or you can make your own out of Red Ribbon from Michaels Craft
- Command Stripe Outdoor Window Hooks (It is very important to get the hooks specially made for the outdoors, the regular ones won’t stay on)
- Rubbing Alcohol
- Paper Towels
Shop the supplies:


Step One
Clean your windows well. Take the Rubbing alcohol and put some on a cloth or paper towel. Rub around the entire area where you will hang your hook. You will want to do this when the temperatures are not freezing! Read the package instructions throughly.
Step Two
Remove the black and white liner side that says window or wall side and apply it to the window where you would like your hook to hang. Press the entire strip for a full 30 seconds pressing up and down on the strip. (be sure to place the hook in the same area on each window so they are uniform)
Step Three
Remove the blue liner. Press the hook to the wall stripe and hold firmly for 30 seconds.

Step Four
Wait at least one hour before hanging anything on the hook. This is a very important step. The adhesive needs time to bond or it will not hold the weight of the wreaths. I try to wait at least 24 hours to ensure the hooks are on well before hanging anything heavy on them.

Step Five
Hang the wreaths on the hooks. You can also us some string to tie them more securely to the hook if you experience a lot of wind in your area.

Step Six
When you would like to remove the hook, stretch the strip slowly against the window at least 12 inches to release it. Always pull straight down not towards you or it will break!


Pretty simple, and it doesn’t damage your windows. They hold up very nicely in the wind as well. With the kind of wreaths I had they have wire as the base and were able to hook on nicely. They stayed put really well. I think one may have fallen off in some really high winds, but that was it! My hooks always stay on because I have carefully prepared my windows, and made sure to buy the hooks that are specially made for the outdoors!
The command strips are very easy to remove and made it really easy to make my home festive for the holidays.

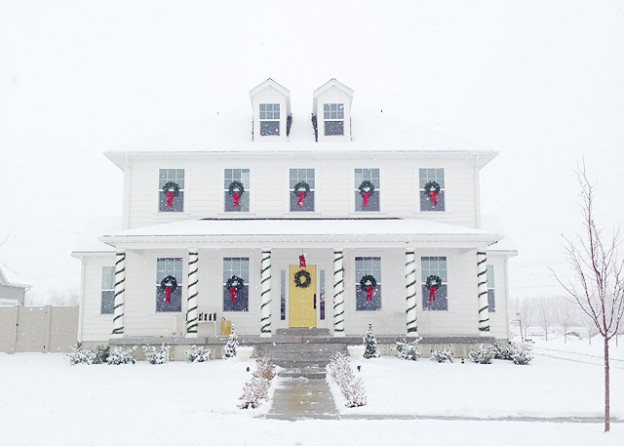
I loved how it looked on Christmas morning in the snow! My family during our magical snow storm on Christmas morning 2014!


I hope this helps if you are looking to hang holiday wreaths on your windows this year!
Can you believe Christmas is just around the corner?!
{all photos by me}