I love this time of year! So many great holiday treats to eat and to make!
I am teaming up with Harmons grocery stores today to bring you an amazing recipe for salted fleur de sel vanilla caramels!
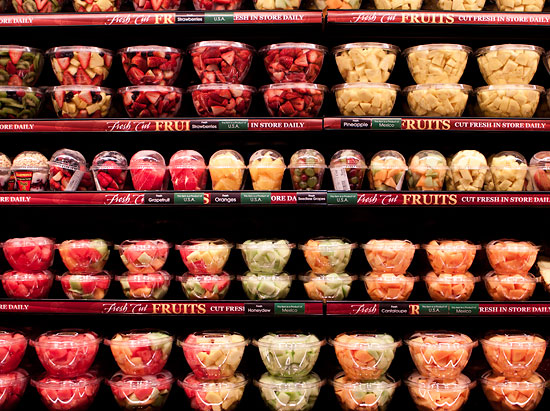
I was able to tour the downtown Salt Lake City Creek Harmons! If you haven’t been in this store, it is amazing! Unlike any grocery store I have been in!
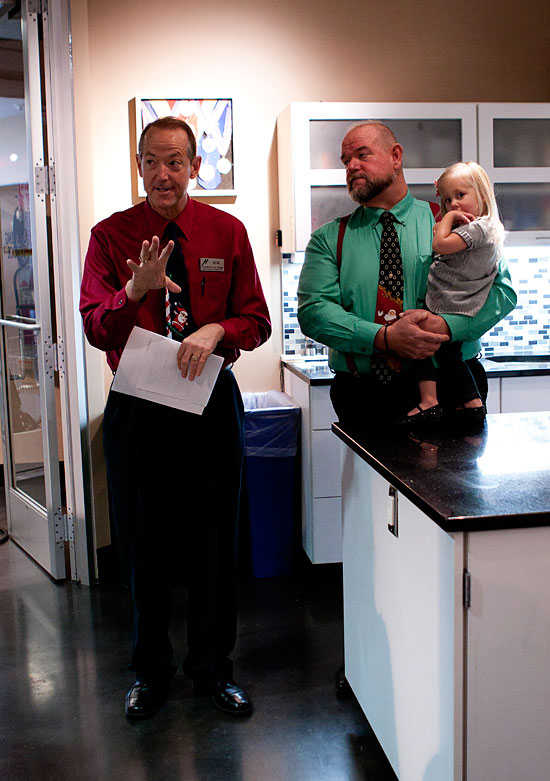
We were able to tour many areas of the store, and learn about Harmons amazing products from their happy employees along with owners Bob and Randy!
A few of the highlights for me:
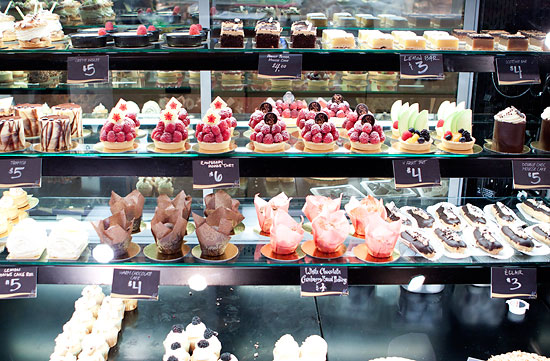
Everything from the Harmons Deli and Bakery is freshly made from scratch in store. It never comes frozen. Even the salad dressing in their salad bar is made from scratch!
The bakery is top notch! I’ve never seen such beautiful pastries come out of a grocery store! All made from scratch, even their dough!
Their meat department is amazing! They fly in their fish fresh, and their meat is never frozen, it is local and fresh!
They sell ready cut, ready made items made from scratch for convenience and to keep your family healthy on-the-go.
All of their employees take pride in their work, and you can see it when they explain their job to you, they are passionate about fresh quality food!
The cheese island is an island I would like to be stranded on! Amazing cheese local, and from all over the world. They even went to Italy to scout out the best parmigiano reggiano source!
Harmons supports local businesses and features as many local products as they can. Even their flour and salt they use for the bakery is from local sources!
So, let’s talk about the amazing selection of gourmet salts they sell at Harmons near their cheese island.
I’ve never seen such an array of different kinds of salt. They sell everything from fleur de sel sea salt, to Himalayan pink salt, to lavendar salt.
I love how they sell smaller containers of their gourmet salts. Since gourmet salts can be pricey, and you may only need a little for your recipe, it is nice to have them sold in several different sizes.
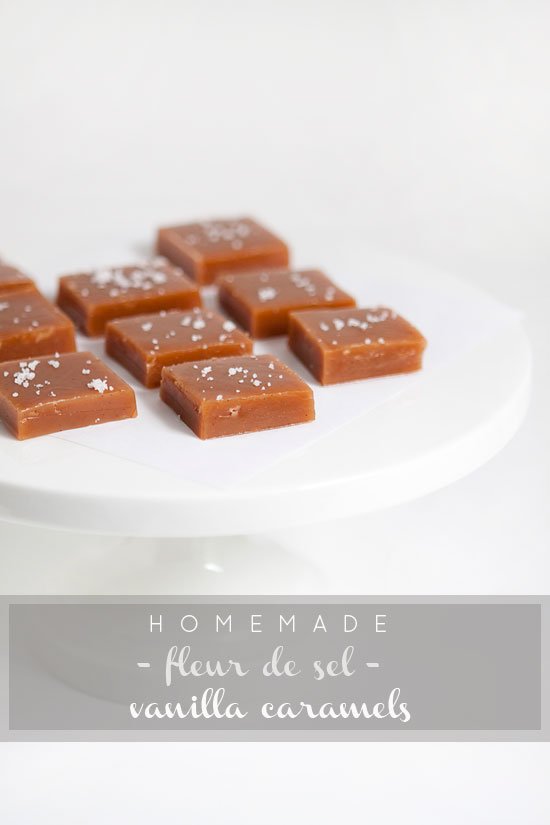
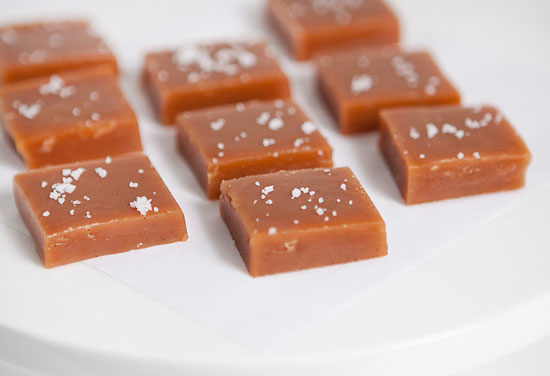
Now, let’s get back to the amazing fleur de sel sea salt vanilla caramels!
These amazing caramels have real vanilla pods scraped with fresh vanilla beans that give them amazing flavor!
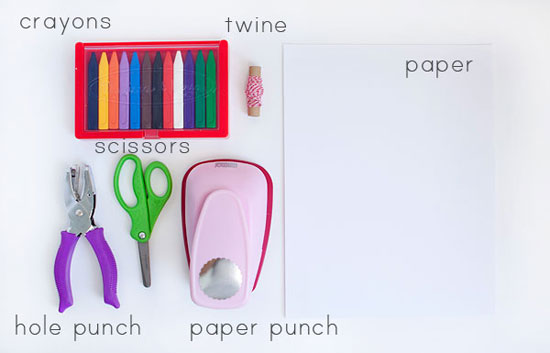
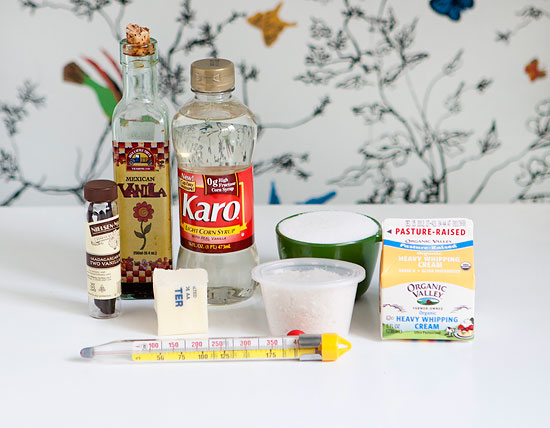
You will need a few items, I was able to pick all of these items up at Harmons Grocery:
Vanilla Caramels with Fleur de Sel
adapted from Ina Garten
1 cup heavy cream
5 tablespoons unsalted butter
1/2 teaspoons pure vanilla extract
1 vanilla bean pod, sliced lengthwise and scraped of vanilla beans
1 tsp fleur de sel sea salt, plus more for sprinkling
1 1/2 cup sugar
1/4 cup water
1/4 cup light corn syrup
1) Line the bottom and sides of a 8×8 inch pan with parchment paper
2) Mix cream, butter, vanilla, vanilla bean pod and vanilla beans, and fleur de sel in a small saucepan over medium high heat. Bring to a boil until just bubbling, then remove from heat and set aside.
3) Combine sugar, water, and corn syrup in a large saucepan. Bring to a boil over medium high heat. After sugar is dissolved, gently hold the pan by the handle and swirl the pan occasionally. Try not to stir with a spoon as it may cause sugar crystals to form. Once the mixture turns a golden brown after about 3-5 minutes of boiling. Remove from heat.
4) Remove the vanilla pods from the cream mixture, and carefully mix the cream mixture into the saucepan with the sugar corn syrup mixture. Stir quickly with a wooden spoon. The mixture will spit and spat, but be sure to combine them quickly. Place the saucepan back on the heat over medium low, and continue to simmer undisturbed until it registers about 230 degrees F on the candy thermometer for a soft chewy caramel or to 248 degrees F for a little firmer chewy caramel. (About 7-10 minutes) Once it reaches your desired temperature. Immediately remove from the heat and pour into your prepared 8×8 pan and allow to cool for 15 minutes, then sprinkle with a little fleur de sel on top. Then, continue to let it cool until completely set and cooled.
5) Carefully remove the caramel from the pan holding the edges of the parchment paper, and peel off the parchment paper. Place the caramel on a cutting board, and cut them with a buttered knife or pizza slicer into 1×1 inch squares.
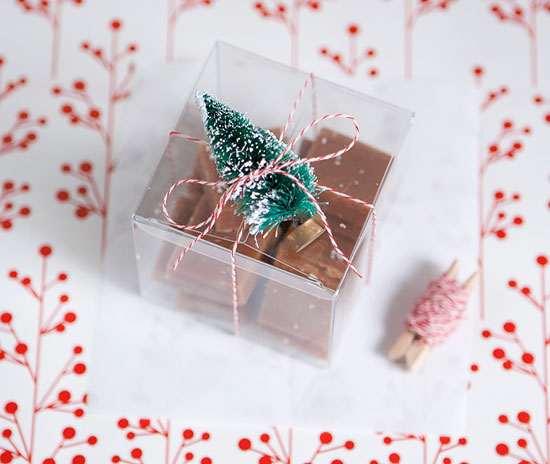
Wrap individually in cellophane or wax paper, and package them up for your loved ones and neighbors this holiday season!
Now for the fun part!
Harmons is giving away $50 gift cards to their grocery stores! (Utah residents only)
You have 5 chances to win a $50 gift card! Enter by Dec 14th!!
Pop on over to see what recipes these bloggers are sharing with their goods from Harmons:
Brassy Apple
One Charming Party
Oh Sweet Basil Tatertots and Jello
{Disclosure: All photos by me, Caroline Armelle Drake. This is a sponsored post by Harmons Grocery. All thoughts and opinions are my own.}
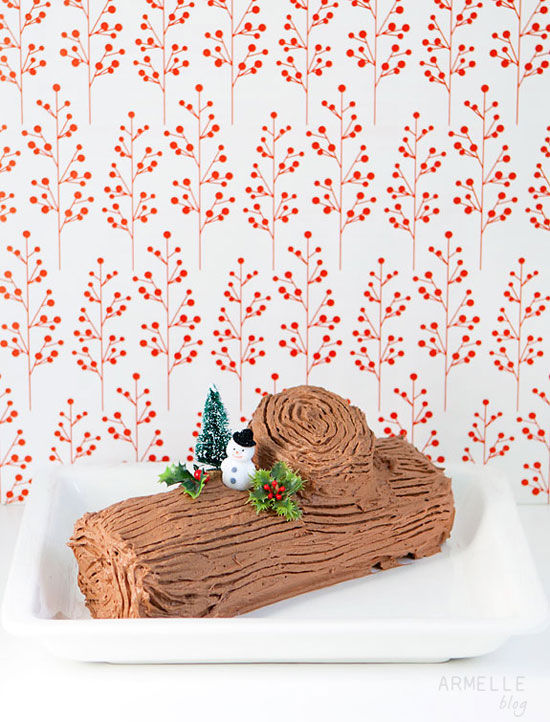
Bûche de Noël literally means “Christmas log” in French, referring to the Yule log that would be burned in the the fireplace in centuries past for good luck and healing properties.
Today many families, like mine celebrate this tradition, and bake a Bûche de Noël around Christmas time. Growing up, and still today, we prepare and eat a Bûche de Noël cake for Christmas Dinner.
It has been such a fun tradition in our family over the years, and I hope it can be apart of your special holiday in the years to come!
The Bûche de Noël can be an intimidating cake to make, but it is actually not too difficult, it just has several steps in order for it to come together. But, all the work is worth it
in the end when you bit into that light sponge cake filled with pastry cream, and topped with chocolate buttercream frosting!
Bûche de Noël (Yule Log) Traditional Cake
(makes one log cake, serves about 6-8 people)
Ingredients for the Sponge Cake
5 eggs, separated (at room temperature)
1 cup flour
1 cup sugar (separated 3/4 cup and 1/4 cup)
1/2 teaspoon baking powder
2 teaspoons vanilla
1/2 teaspoon salt
Directions:
1) Preheat oven to 375°F. Grease 15-1/2X10-1/2-inch jelly-roll pan; and line pan with parchment paper. Place flour, baking powder and salt in small bowl; stir to combine, and set aside.
2) Beat egg yolks and 3/4 cup granulated sugar with a mixer at high speed about 5 minutes or until thick and lemon-colored, scraping down side of bowl once. Beat in the flour, baking powder, and salt mixture 1/4 of a cup at a time allowing it to incorporate before adding more. Then, beat in the vanilla; set aside.
4) Beat egg whites in clean large bowl using clean beaters with electric mixer at high speed until foamy. Gradually beat in remaining 1/4 cup granulated sugar, 1 tablespoon at a time, until stiff peaks form.
5) Fold egg whites into the egg yolk and flour mixture 1/3 of the egg white mixture at a time, until it is evenly incorporated. Spread mixture into the prepared parchment lined pan. Bake 12 to 15 minutes or until cake springs back when lightly touched with finger.
6) Lightly sift a few tablespoons of powdered sugar over a clean dish towel. Loosen warm cake from edges of pan; invert onto prepared dish towel. Remove pan; carefully peel off the parchment paper. Gently roll up cake in the dish towel from short end, jelly-roll style. Let rolled cake cool completely on wire rack.
For the Pastry Cream Filling 2 cups half-and-half
1/2 cup sugar
Pinch salt
5 large egg yolks
3 tbsp. cornstarch
4 tbsp. cold unsalted butter, cut into 4 pieces
1 1/2 tsp. vanilla extract (or vanilla bean paste, that is my preference!)
1) Heat the half-and-half, 6 tablespoons of the sugar, and the salt in a saucepan over medium-high heat until simmering, whisk occasionally to dissolve the sugar.
2) Meanwhile, combine the egg yolks and remaining 2 tablespoons sugar in a medium bowl and whisk until the sugar has begun to dissolve and the mixture is creamy, about 15 seconds.
3) Whisk in the cornstarch until combined and the mixture is pale yellow and thick, about 30 seconds.
4) When the half-and-half mixture has reached a simmer, slowly add it to the egg yolk mixture to temper, whisking constantly. Return the mixture to the saucepan, scraping the bowl with a rubber spatula. Return the mixture to a simmer over medium heat, whisking constantly, until a few bubbles burst on the surface and the mixture is thickened and glossy, about 30 seconds.
5) Remove from the heat, and whisk in the butter and vanilla. Strain the pastry cream through a fine mesh sieve set over a medium bowl. Press plastic wrap directly on the surface to prevent a skin from forming and refrigerate until cold and set, at least 3 hours and up to 2 days.
Once the cake has completely cooled, unroll the cake. Spread the cake with a layer of the chilled pastry cream.
Re-roll the cake, making sure to tuck in the first part well. Use the towel by holding it up at one end to allow the cake to roll down the towel on it’s own. Try not to handle the cake too much to prevent cracking.
Once the cake is rolled up into a nice cake roll, take a serrated knife and trim off one end at and angle.
This piece will serve as the “stump” on the log.
Use a toothpick to secure the stump in place on the top of the rolled cake.
Now, it is time to frost the log!
For the Chocolate Buttercream Frosting
1 cup (2 sticks) un-salted butter, slightly soft
1/8 tsp salt
6 tablespoons cocoa powder
4 cups powdered sugar
6 tbs cream (milk is also ok)
1 teaspoon vanilla
1) In a stand mixer, beat the butter, and salt for 3 minutes on medium speed. Turn down a notch to medium low speed, and add cocoa powder one table spoon at a time, until incorporated.
2) Add powdered sugar a half cup at a time until well incorporated.
3) Add cream, then vanilla, and whip to incorporate.
Add a thin layer of chocolate buttercream onto your serving platter about the size of the log so when you cut the cake, there will be frosting all the way around. Place the log on top of the layer of frosting on your platter.
Then, a thin layer of chocolate buttercream to the log, and smooth the frosting out evenly.
Next, take a fork, and us the tip of the fork and run it down the cake, and spiral along the top and bottom of the log, as well as the stump.
This will give your Bûche de Noël an authentic log look!
Decorate your Bûche de Noël with some fun Christmas scenes and serve it as the show stopper at your next Holiday gathering!