
I have seen a lot of great Ikea hacks with the Ikea rast small dresser turned bedside table or nightstand. After i saw this one, i kept it in my “to do” files and i knew it would be a great option for some new bedside tables / nightstands we were in desperate need of.
It really is the perfect size and offers some great storage. It is also nice that it comes un-painted so that you can customize your piece to any color you would like.
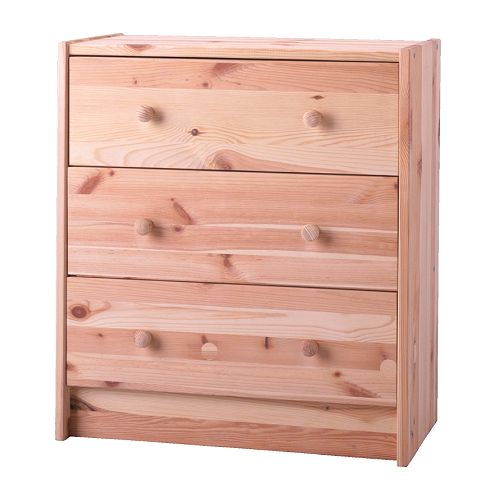
So, we started out with two ikea rast dressers.
This is what they looked like before:
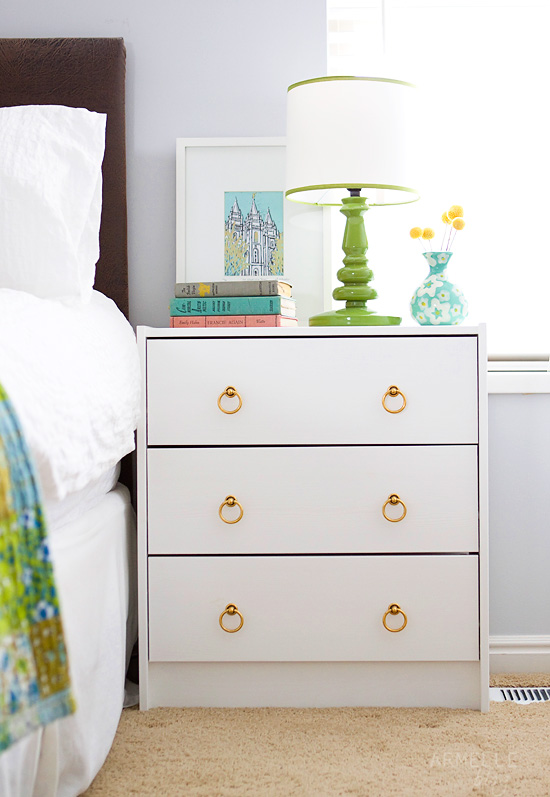
And, here’s the after, painted white with new hardware:
I’ve had a lot of questions about my painting process, so here’s a little rundown of how i usually paint or re-paint any kind of furniture.
How to paint furniture:
1. Clean/ wipe down the furniture really well, especially if it is used. i usually just use baby wipes or clorox wipes, but just make sure there aren’t any fibers hanging around.


2. Apply two coats of kiltz primer (i prefer the latex kind) with a good quality foam brush from a good paint or hardware store, not the craft store kind. the foam brush is key, it is what makes the end result nice and smooth. this dries really fast, so i usually wait about 20 minutes or so between coats if i am in a hurry. and, no i do not sand. i feel like it is a waste of time and i don’t want to inhale all those weird bits of paint. so, i just use primer over everything and it has worked very well. even for veneer finishes, like on the ikea malm bed i just painted. the primer helps the paint stick to pretty much anything i’ve tried.
3. Next, apply two to three coats of the color of your choice with a foam brush (i usually wait at least an hour between coats, or until it is dry) but, look at the instructions on your paint. i like the furniture paint found locally at four chairs furniture, they use old village paint, but i have also used stuff from lowes or home depot, and it has been fine too. also, since the foam brushes are pretty cheap, i just throw them out each coat and use a new one.


4. Next, i let the piece dry at least over night before putting on the two to three coats* (depending on how shiny you want it) of the top coat. i prefer to used the water based minwax polyurethane finish. i usually let it dry at least an hour or more between coats. *for the top finish, i don’t use the foam brushes, because it sucks up the finish. i use a synthetic brush like this one, i think it’s made of nylon or polyester. i paint it on quickly with nice long strokes. it seems the more you go back over a layer, the more it seems to add a weird texture, so i try to work fast. if you do find some clumpy-ness then just let it dry and sand it with a very very fine sand paper then re-apply. when finished with each coat make sure to clean the brush really well with really, really hot water between coats, or you can get some stickiness and build up on your piece.
5. Let it dry a day, then add the hardware!
Hopefully this helps! I have painted a lot of stuff the last little while, and this process is what has worked best for me!

I found the hardware for my nightstands here. size 51 mm x 43 mm in burnished bronze.
adore your diy dressers of course, but i'm mostly curious about your little painting of the salt lake temple! it's adorable!
hi leslie.
i bought it from one of the handmade markets i usually sell my jewelry at. it is by the happy little artist on etsy. here is the link:
http://www.etsy.com/listing/59590930/salt-lake-temple-lino-cut-wheat-and
Love the nightstands~ they are perfect! I also saw them on aubrey@lindsey's blog and fell in love with them. Thanks for the tip on the hardware, and you seriously can't beat the price! Your room looks amazing. Well done:)
p.s. did you make your throw~pillow? Wondering where you found the chevron print? Love it!
hi sherice.
the chevron pillow is from modern thread: http://www.etsy.com/shop/modernthread
Adorable results Caroline, as always! I really appreciate the diy detail…especially that you don't sand! Thanks and good luck with baby #3!!
Love this idea! And I love the hardware you picked out. Fits perfectly in the room.
AMAZING!
these are amazing. i have been following your blog for a while and am so impressed with every single thing you do. i definitely showed my husband this post and told him to get ready, cause we were definitely doing this!
i also love the slc pic on your night stand. thanks for sharing the link!
Love you for showing this little tutorial on painting furniture without sanding! I have a long 6 drawer dresser filling up one half of my garage that my husband can't wait to get rid of or for me to do something with. Now I'm going to and am so excited, even though I know it will take some time. I have been loving your blog and love all the tips and every post you do. Thanks for sharing your talent!
they are so beautiful! as is your room! i need to try this.
Caroline, you are officially my hero for this. That's exactly the style of nightstand I want… and as a bonus, I can paint them and personalize them to fit in my bedroom. I may have to head to Ikea this weekend (or at least sometime soon)!
Holy smoke, that is awesome! Love the drawer pulls and great job on the paint.
Love the green lamps on your nightstands! May I ask where you got them?
This is great! What gloss paint should I purchase — I'm assuming flat…
mary: i bought the lamps from target.
and,
bhappy: i think it's your personal preference. i think i used satin or eggshell
Where did you get that print of the SLC temple? Or maybe you did it yourself? I have been looking for church art, that isn't my-parent's-church-art, ya know? Do tell!
hi chris loves julia.
i listed the link in an above comment.
thanks!
Beautiful for sure! I linked this to my dressers project post too – for inspiration!
Love your hack! Beautiful work. I'm thinking about using the Rast dressers in my entryway. Can anyone tell me the depth (from top to bottom) of the drawers?
I am planning on buying an IKEA MALM used bed set, but it's in the wrong color… I read somewhere that it's not good to use Latex paint on furniture because it doesn't hold well. Is this your opinion? How has it held up against everyday use.
Thanks!
A seventeen year old, DIY-er
hi regina.
i used latex paint, but you HAVE to use a primer first, or it won't stick. it has held up ok. there are a few spots where the paint has come off, but my kids are really hard on it. and, i just re-touch it.
Hi! Am excited to try this, but I have a question first – do you paint and then assemble or assemble then paint. I've got the unassembled nightstands in my garage, but wanted to make sure before I get started. Thanks!
I assembled them first then painted.
Also. Be sure to prime first, especially if painting it white. The knots in the wood are pretty dark.
For knotty pine or any hard to cover surface you will want to use Old Village Under/Over primer. Is primer will stick to anything! It is acrylic water-Base and will stick to oil paint, plastic, metal, anything! It is great stuff!
LOVE THIS SOOOO MUCH but wondering about the approx total cost of the project ? For one with the primer and paint coats and multiple brushes and hardware, what cost are you looking at? Any approx would help so much, thank you for your time and response!!! Love this DIY so much, will share the link with my friends and posters
I can't remember for certain, but roughly $60 each night stand
A-ma-zing! ;o)
Cute!!
I picked your idea in my blog:
http://thefivedreamcatchers.blogspot.com.es
I hope you visit!!
Thanks Xx
How much Kilz and paint did you buy?
I just usually keep a gallon around, but you would be fine with a half gallon.
I’m brand new to DIYing furniture, so this may be a dumb question. But I LOVE these and I want to make my own!! When you paint these, do you leave the inside of the drawers unpainted or do you literally paint everything? Thank you!
I don’t usually paint the inside of the drawers. Just the front where they show from the outside.
Where did you get the hardware?