Recipe // French Apple Tart

November 2, 2015

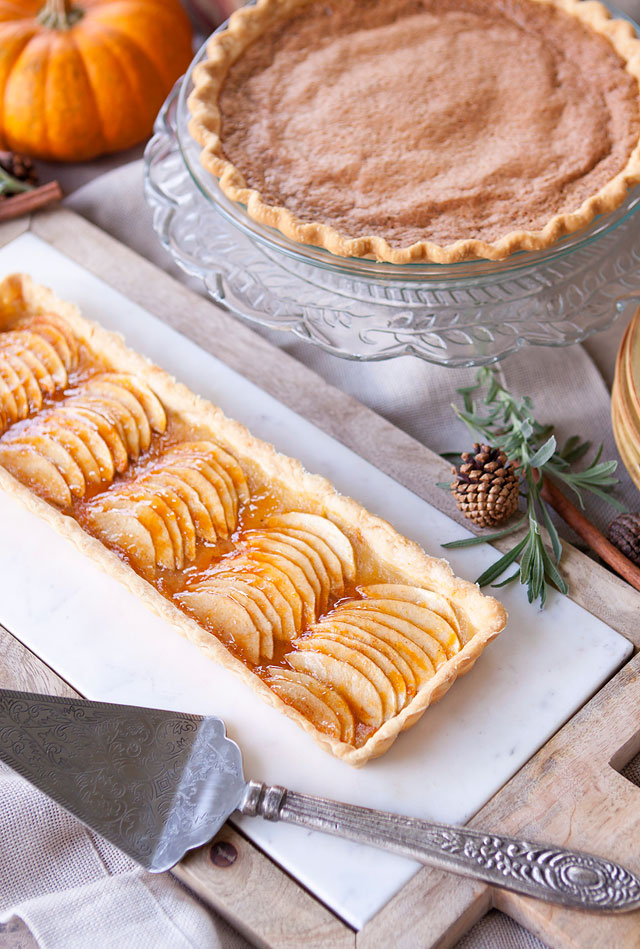
French Apple Tart was always a staple in my household growing up, and it still is.  It is usually served at Thanksgiving or on our Christmas table, and stems from my French side.  
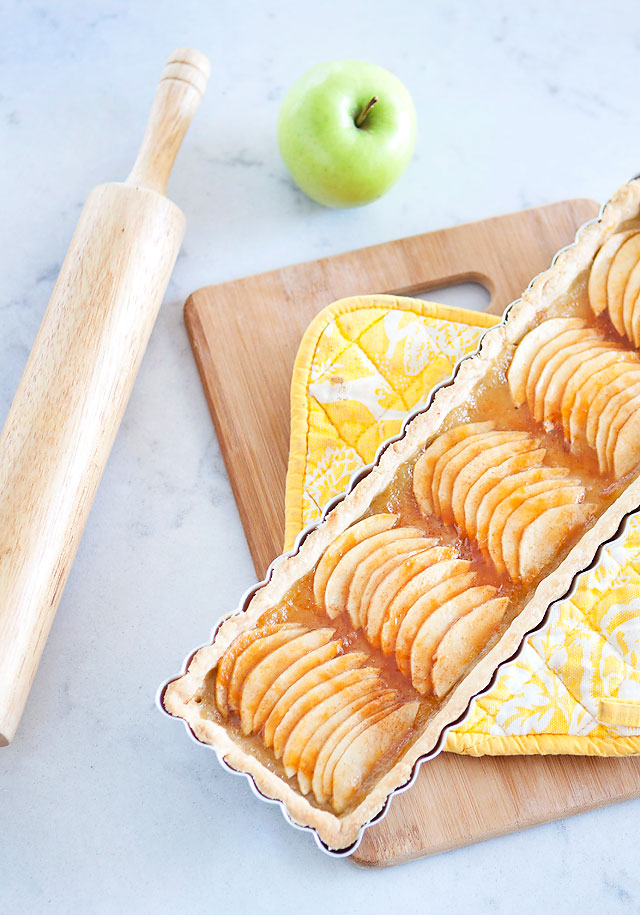
It is always a show stopper, and always tastes as good as it looks!  French style apple pie is my favorite because the apples are lined up so thin. I prefer it that way vs the American Apple pie.  A nice thin layer of apples is the perfect amount for me!
I am teaming up with Harmons Grocery today, and all the Harmons Bloggers to bring you some of our favorite pie recipes (see all the links at the bottom for more pie recipes and ideas!).  We hope that you can get some good ideas for the upcoming Thanksgiving holiday.  Pie season is just around the corner!
French Apple Tart is a pretty simple pie to make.  Once you make your dough, it all comes to together nicely.
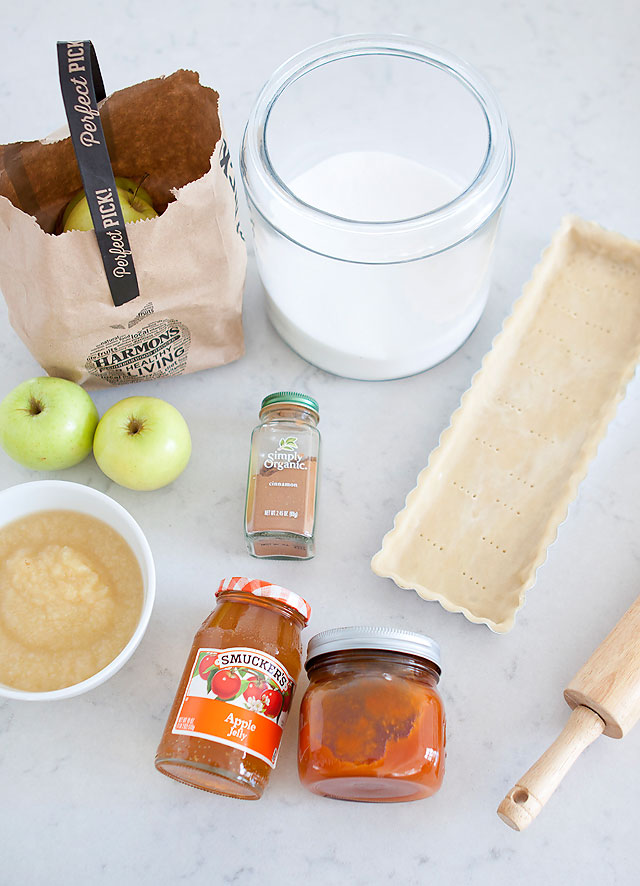
Homemade pie dough is a must for me when it comes to pies.  A homemade dough makes all the difference in my opinion.  It doesn’t take long to make the dough either. 
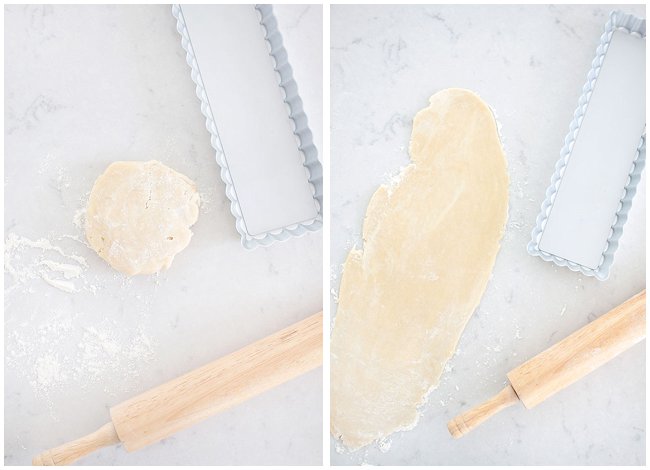
After I make the dough and roll it out, I like to carefully roll it up onto the rolling pin, then carefully roll it back out onto the pie tin I’m working on.  Then, for a straight edge top pie tin, I take the rolling pin, and roll it across the top to cut off any excess edges.
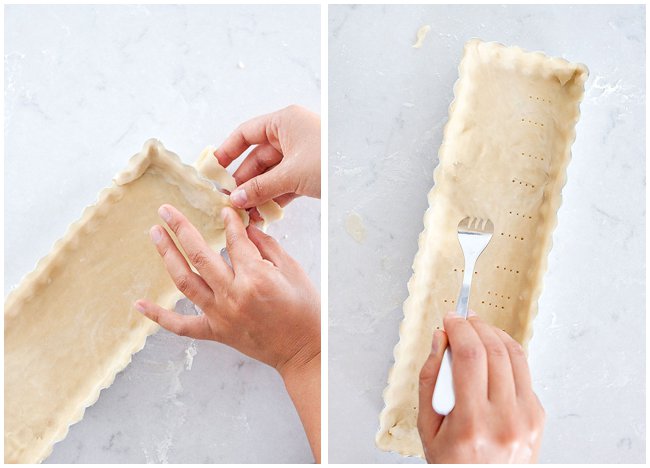
Next, I take fork, and poke some holes in the bottom of the dough, then I allow it to chill again for a few minutes.
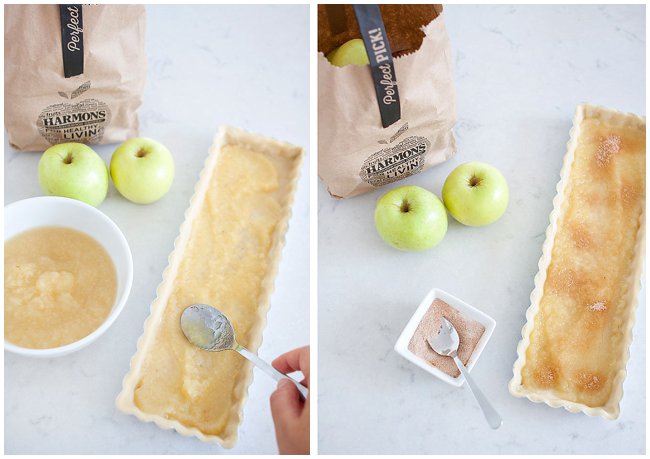
Add a layer of applesauce and some cinnamon sugar.
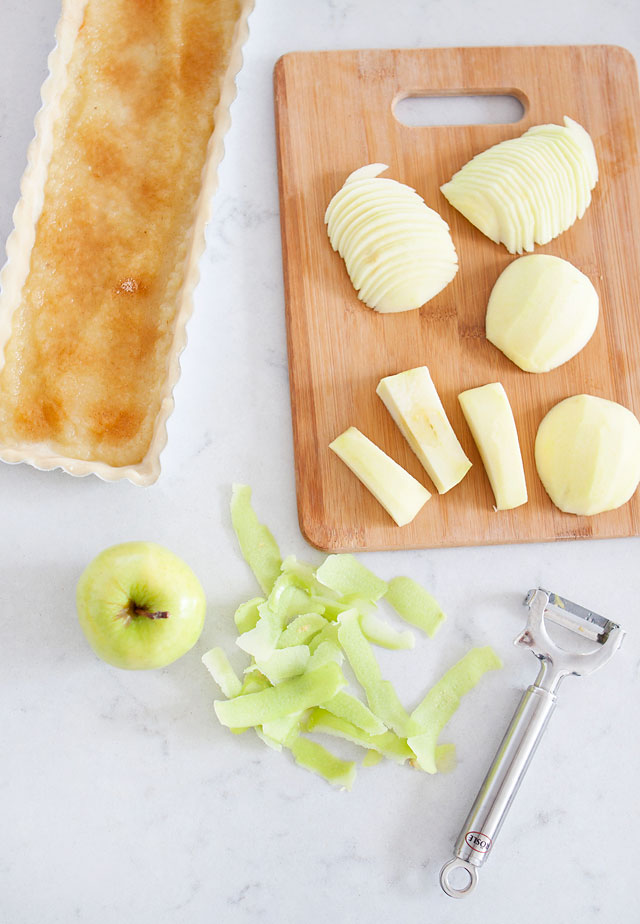
Peel and slice the apples thin. 
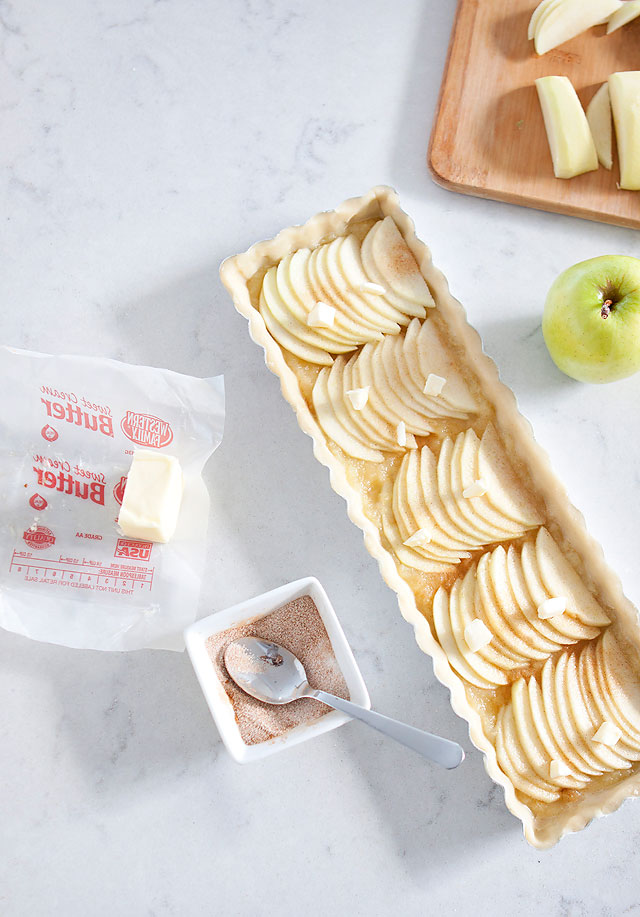
Fan them out, and place them over your applesauce and cinnamon sugar. Add a little cinnamon sugar to the top, and some little pieces of butter then put it in the oven to bake.
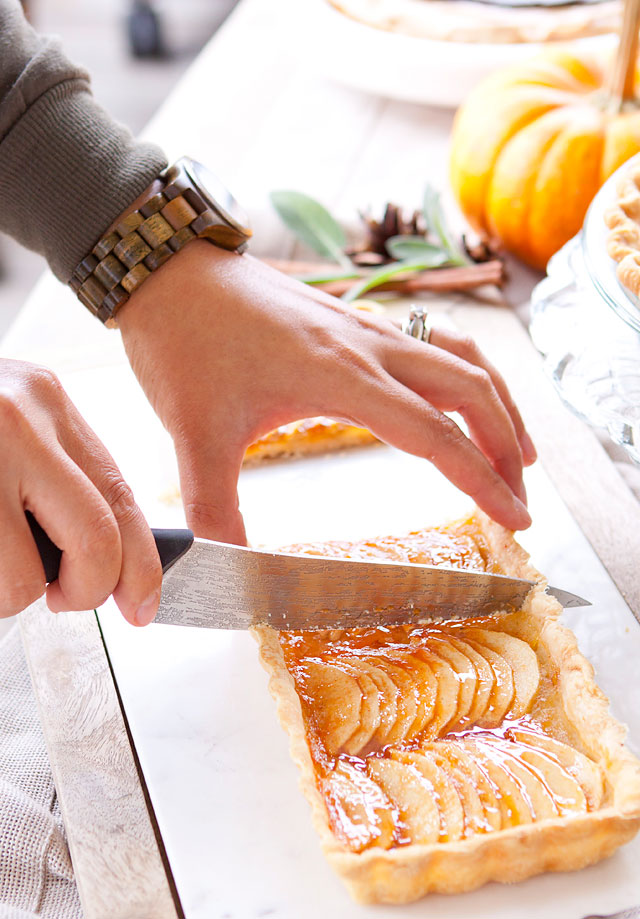
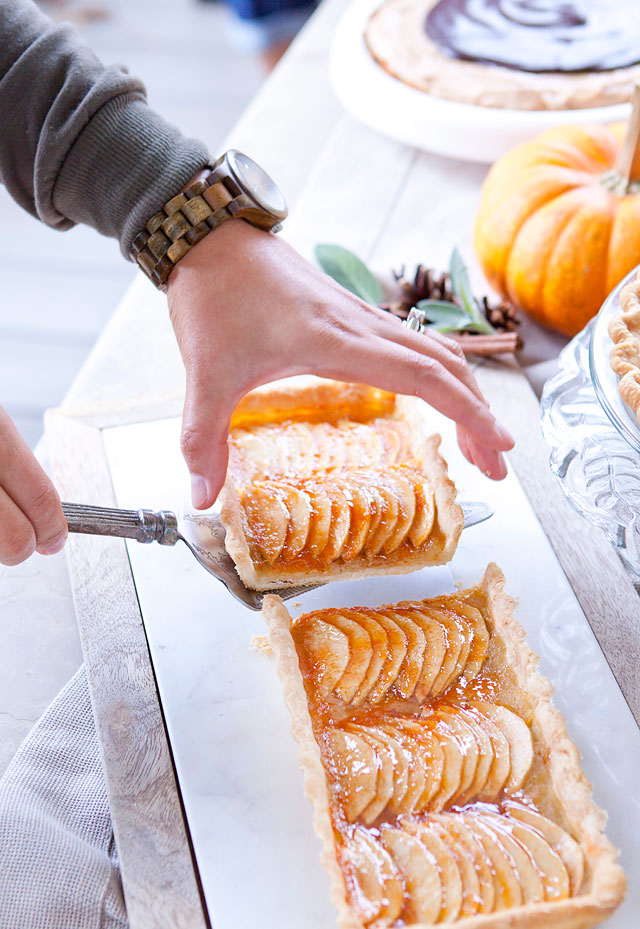
After it bakes add some apricot preserves, and apple jelly to finish it off.  It not only adds a beautiful shine to the top of your tart, but also an amazing flavor!
French Apple Tart

Pate Brisee Pie Dough, Martha Stewart
Ingredients
2 1/2 cups all-purpose flour
1 teaspoon coarse salt
1 teaspoon sugar
1 cup (2 sticks) chilled unsalted butter, cut in pieces
1/4 to 1/2 cup ice water

Directions
Place the flour, salt, and sugar in the bowl of a food processor, and process for a few seconds to combine. Add the butter, and process until the mixture resembles coarse meal, about 10 seconds. With the machine running, add the ice water in a slow, steady stream, through the feed tube, just until the dough holds together. (you may not need to use all the water) Do not process for more than 30 seconds.

Turn the dough out onto a work surface. Divide in two. Place each half on a sheet of plastic wrap. Flatten, and form two discs. Wrap, and refrigerate at least 1 hour before using.

Roll out onto a tart pan, and poke holes using a fork along the bottom of the crust. You can use two rectangular pie tart tins, or a round.

Filling ingredients
4-5 medium to large golden delicious apples, peeled and thinly sliced
1/2- 1 cup applesauce
2 tablespoons butter cut into small pieces
1-2 tablespoons sugar
1/2 teaspoon cinnamon
1/2 cup apricot preserves
2 tablespoons water
½ cup apple jelly

Directions
Spread a thin layer of applesauce onto the un-cooked pie crust. Mix together sugar and cinnamon and spread half of the mixture over the applesauce. Start layering apples in a nice pattern over the applesauce. Sprinkle the remaining cinnamon sugar mixture over the apples. Place butter pieces evenly over the top of the apples.
Bake in a 375 degree oven for about 45-60 minutes or until apples are golden and the dough is cooked. *check halfway to see if edges of dough is too brown or starting to burn. if so take some aluminium foil and line the edges so the showing dough  edges will not burn.
Heat apricot preserves with water in the microwave for 30 seconds. (Optional: strain out the preserves for any large chunks) Brush a thin layer over the apples.  Put ½ cup of apple jelly in the microwave for 30 seconds. And, finish off with brushing a layer of apple jelly.  Allow to set for at least 20 minutes and serve with ice cream or fresh whipped cream.
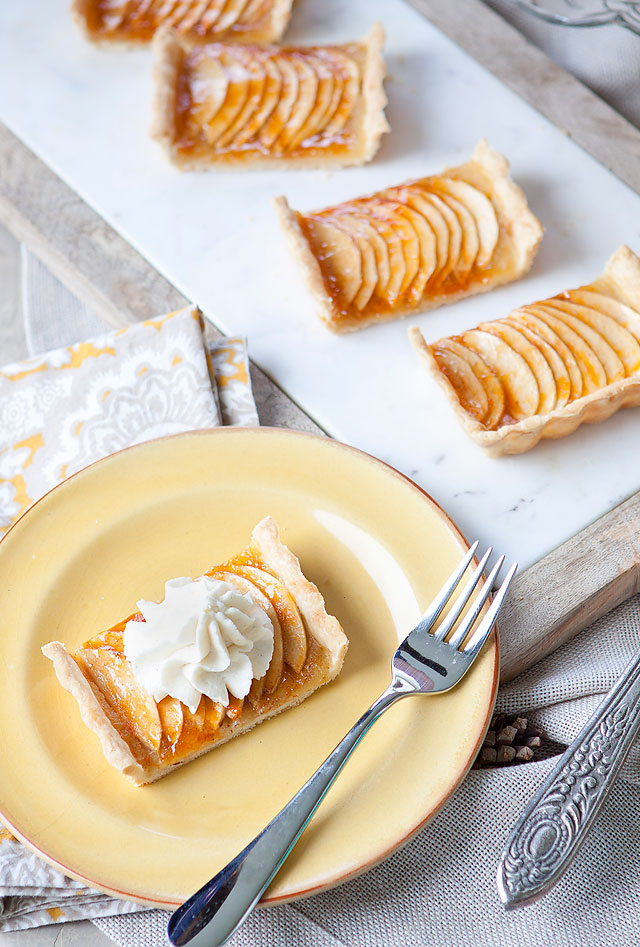
I hope this French Apple Tart becomes a tradition at your Thanksgiving table as it has been at mine!
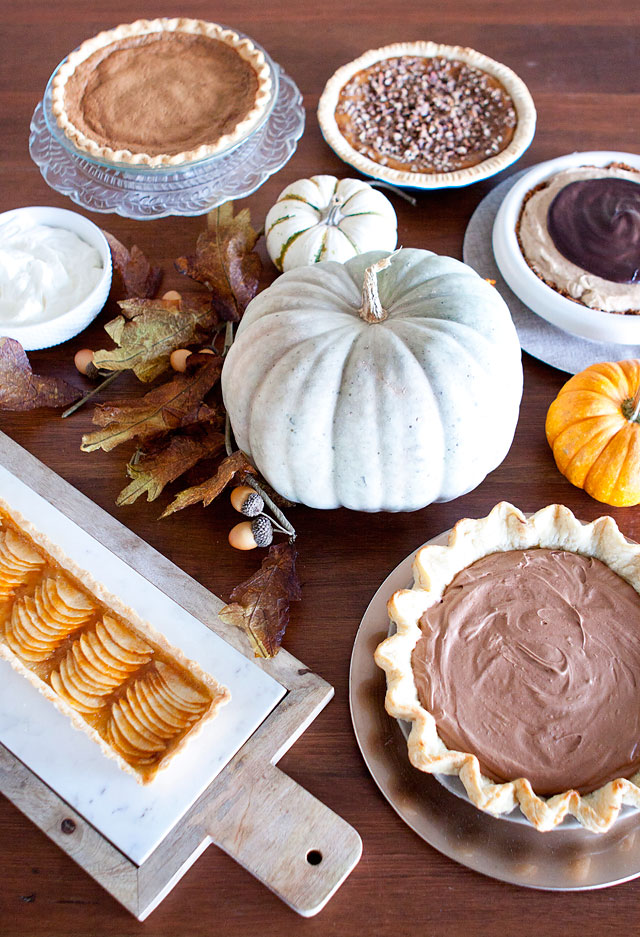
And, for more ideas and recipes for a nice pie table for your Thanksgiving feast, be sure to see my round up of the Harmons Bloggers Holiday Pies!
Chocolate Silk Pie by A Bountiful Kitchen
This post is sponsored by Harmons Grocery, your neighborhood grocery store.

All photos by me.

DIY: Zombie Costume

October 30, 2015

I’m back sharing more of our favorite DIY Halloween costumes from the past!  This little zombie was circa 2013, when my little Norah decided that she wanted to be a zombie!  I have no idea where she even heard of this, but I obliged.
It probably was the easiest DIY costume I have ever done!  This is a perfect last minute Halloween costume, because, chances are you have it all already in your closet! We had everything, so it worked out well that we didn’t have to buy one thing for her costume!
DIY Zombie Costume: (affiliate links used)
  • Some tattered clothing.  We had a white shirt that we used before for a pirate costume that we cut up, so we pulled it out of the Halloween box and put it to use!  Just take an old shirt and rough it up a bit with your scissors.
  • Since she wanted to be a cute girly zombie, we added a skirt from her closet with black and white striped leggings, we added a shirt under her cut up one, and put a belt on to finish it off.
  • She wore her black and white checkered vans to keep with the black and white theme.
  • We did her hair a little crazy and ratted it out and sprayed it with hairspray.
  • The face make up, I used white costume makeup, then added some black costume make up to areas around the nose, moth, check, and eyes for a sunken look.
And, there you have it!  An adorable little zombie.  I remember she played the zombie part well that night, down right freaking me out a bit every so often, ha!
{all photos by me}

Family Travel // Quebec City Canada

October 29, 2015

We recently took a trip to Canada among other amazing places (more to come!), and made a two day stop in Quebec City, Canada. I actually lived in Quebec City a few summers as a young girl as my Father was finishing his PhD.  It was fun to think that I was exploring the same town as my children at the very same ages!
Quebec City is a beautiful town that lies beside the great St. Lawrence River.  It is the oldest still existing fortified city in Northern America.  If you would have blind folded me and dropped me in the center of the old city, I would have thought for certain that I was in Europe!  Especially with everyone speaking French.  It is a beautiful city with a lot of history!
My dad (or Papy to my kids) was also in town for a conference, so it was fun to be able to explore around town with him.  He has spent a lot of time in Quebec with work over the years, so it was nice to have him along to give us the grand tour.  My kids really enjoyed running around town with him.
My Outfit: (affiliate links)
Top: H&M (similar), Skirt H&M (similar), Bag: Baggallini Horizon Crossbody, Sandals: Black Birkenstocks
Place Royale was a gorgeous little town square.  It was really like stepping back in time, and has the oldest stone church in North America built in 1688.
We spent the day exploring Old Quebec City.  Such charming little cobblestone streets with restaurants and shops, it feels really European.
We stopped and ate lunch at a cute little restaurant called Cochon Dingue (Crazy Pig).
We had not one, but two people recommend to eat here, my friend from back in Utah and my cousin who lives in Montreal.  It was extremely kid friendly, and the kids menu was extremely well priced, for around 7 Canadian dollars you could get a three-course meal for the kids including a drink.  My kids loved the homemade macaroni and cheese, and the fresh grilled salmon.  The little pig shaped sugar cookies were adorable, and they even brought out a box of prizes for my kids to choose from before we left!  I highly recommend it if you are traveling to Quebec City, especially with kids!
My husband and I weren’t too hungry, so we decided to try the Poutine.  While in Canada, right?!  If you’re not familiar with Poutine, it is french fries with cheese curds and gravy drizzled all over it.  I for one, think it’s nice for a few bites, but turns out I’m not a huge Poutine fan.  My husband really enjoyed it.
Later on that day, we visited the Fortifications of Quebec City and the Citadel.  We got there a little late, so we weren’t able to go in, but we were able to walk around near the walls a bit with views of the St. Lawrence River.
If you’re ever in Quebec City, here are the top places I’d recommend visiting:


We stayed at the Best Western Premiere Hotel L’Aristocrate.  It was very clean, new,  and a great price, and only about a 10 minute drive into Old Quebec.  We booked the room off of booking.com which gave us a a great deal, even when we booked the day before our arrival and it was very reasonably priced for a Four Star Hotel.  It also has great freeway access and is close to the Aquarium.
Quebec City was so amazing to explore with our kids, it really made me want to take them to Europe someday, I know they would love it!  I of course loved the European feel, and when we stopped in the park to enjoy a moment in our day we were able to pause, and find joy in the amazing opportunity we had to visit such a beautiful historical city with our little family.  Exactly the kind of memories we hope to be making often!
Thanks for following along our adventures!